Customizing The Layers’ GetFeatureInfo Templates
When “clicking” over a feature of a Layer into a GeoNode Map, an info window popups showing a formatted representation of the raw data identified by the coordinates (see Fig. 1)
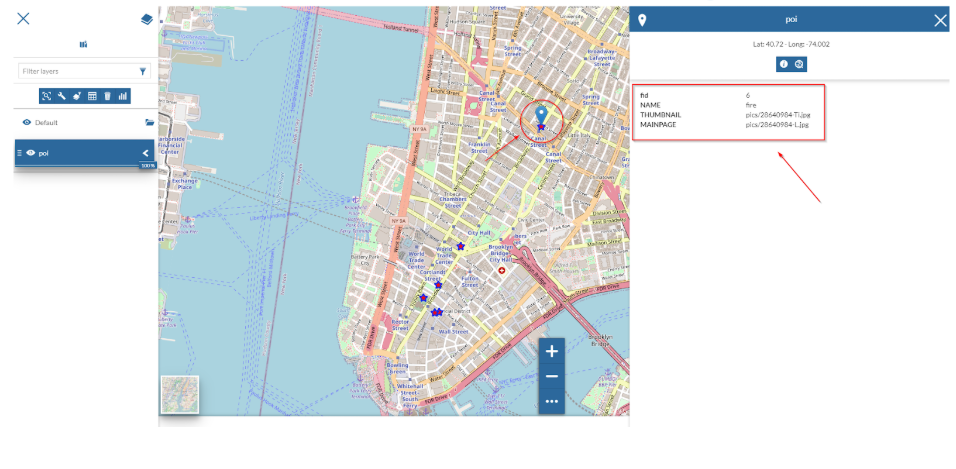
Fig. 1
The way how such information is presented to the user is defined by what we call “GetFeatureInfo Template”. The latter is basically an HTML snippet containing some placeholders and special inline codes that instruct GeoServer on how to generate the raw data output.
The outcome is a rendered HTML snippet with the real values replacing the placeholders of the Template.
Currently, GeoNode allows a very simple mechanism to customize the “GetFeatureInfo Template” of a Layer.
It is possible, through the Layer Metadata Editor Wizard, to assign a name and a label to the attributes we want to display on the GetFeatureInfo output.
Notice that the attributes without a label and name, in case others are present, won’t be rendered at all.
As an instance, by using the example above, we can customize a bit the Layer Metadata as shown in Fig. 2
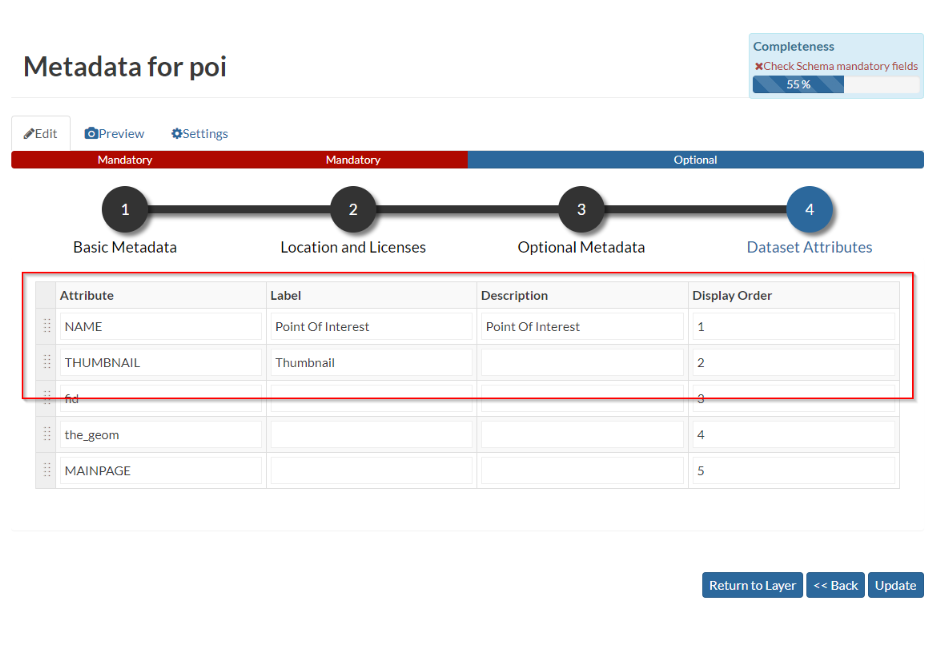
Fig. 2
The “GetFeatureInfo” output will change accordingly as shown in Fig. 3
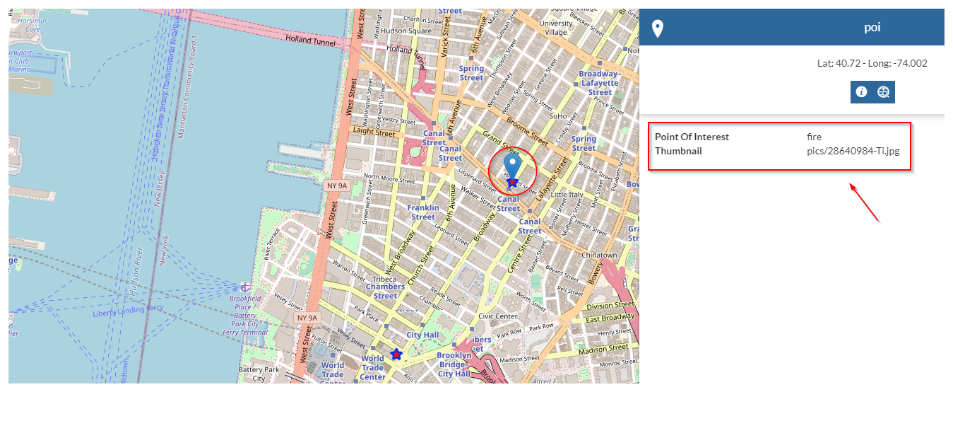
Fig. 3
Simple Template: Assigning A Media-Type To Attribute Values
The easiest way to render a different media-type (image, audio, video or iframe) to a property value, is to change it from the Metadata Editor Wizard attributes panel.
By changing the Display Type of an attribute from this panel as shown in Fig. 4
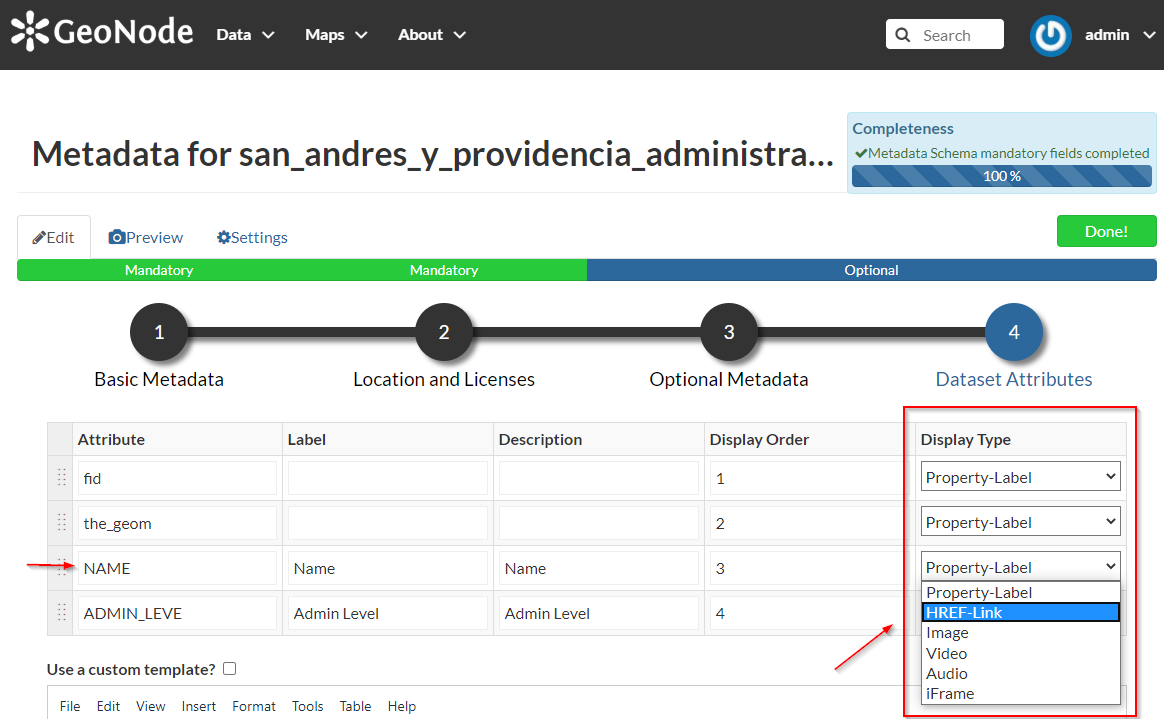
Fig. 4
GeoNode will create automatically the HTML media type when rendering by using the value of the selected property.
So, as an example, if, in the figure above, the attribute NAME contains values representing some links to other resources, GeoNode will create those links automatically for you when clicking over a geometry.
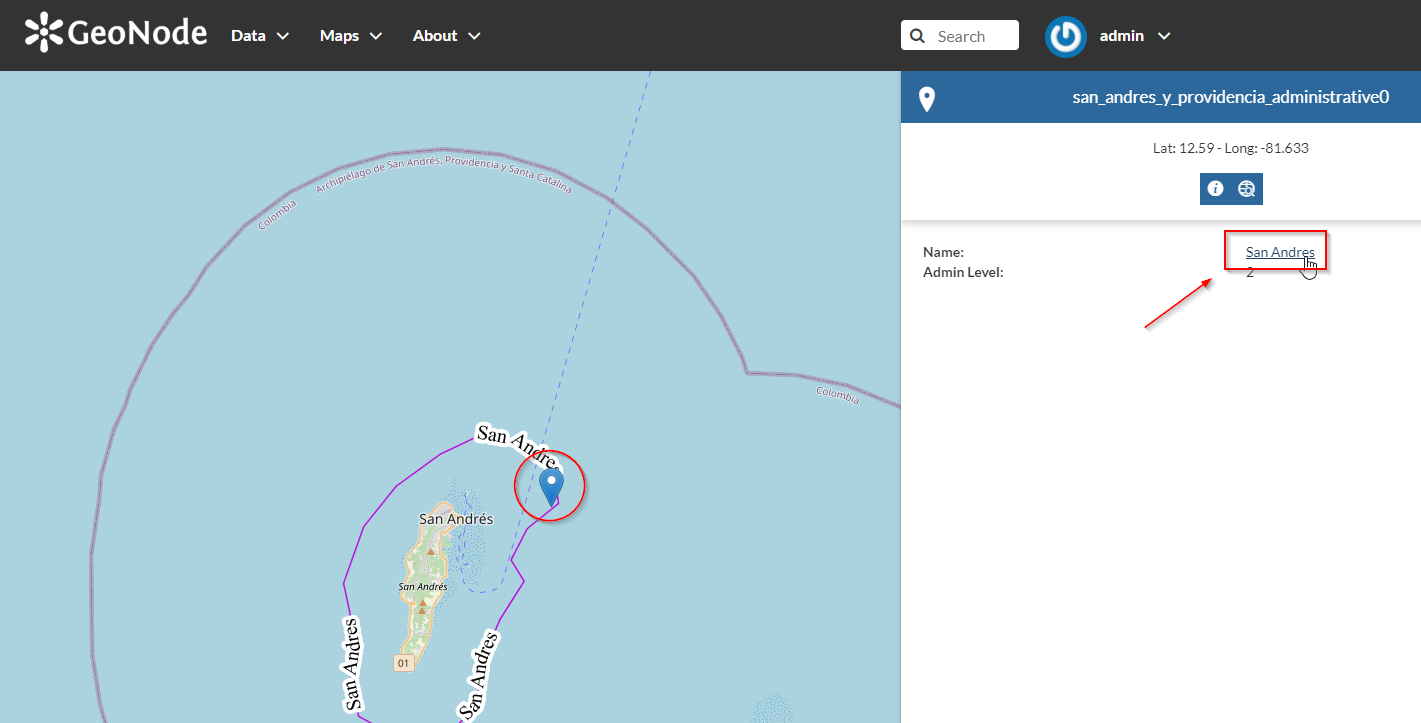
Fig. 5
Selecting image as media-type (Fig. 6)
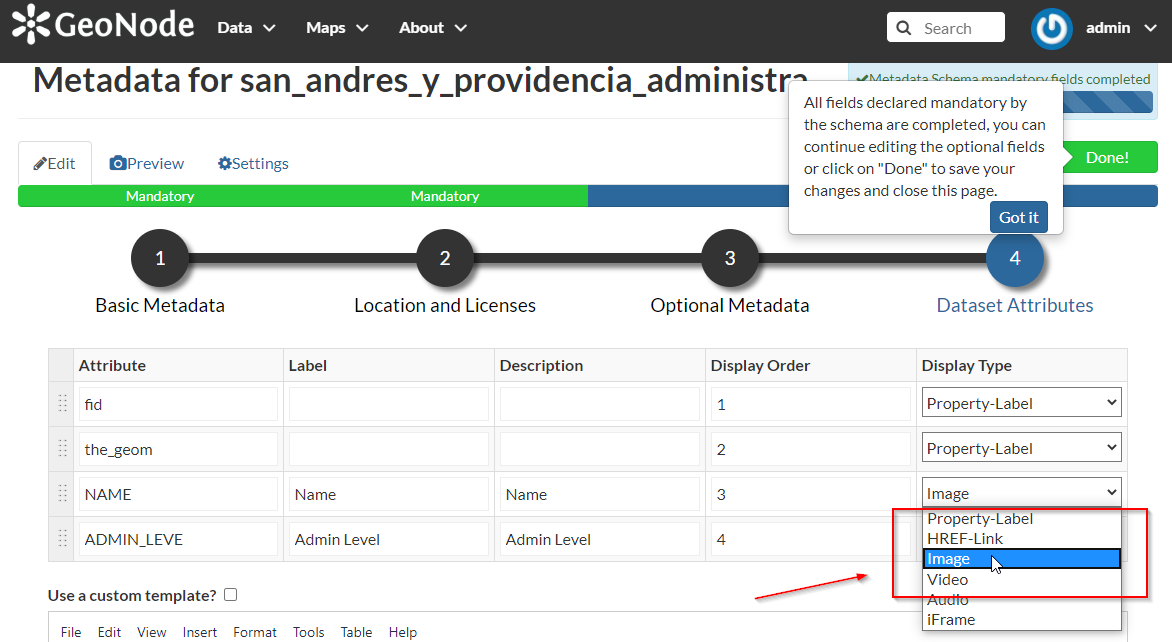
Fig. 6
and editing the contents accordingly (Fig. 7)
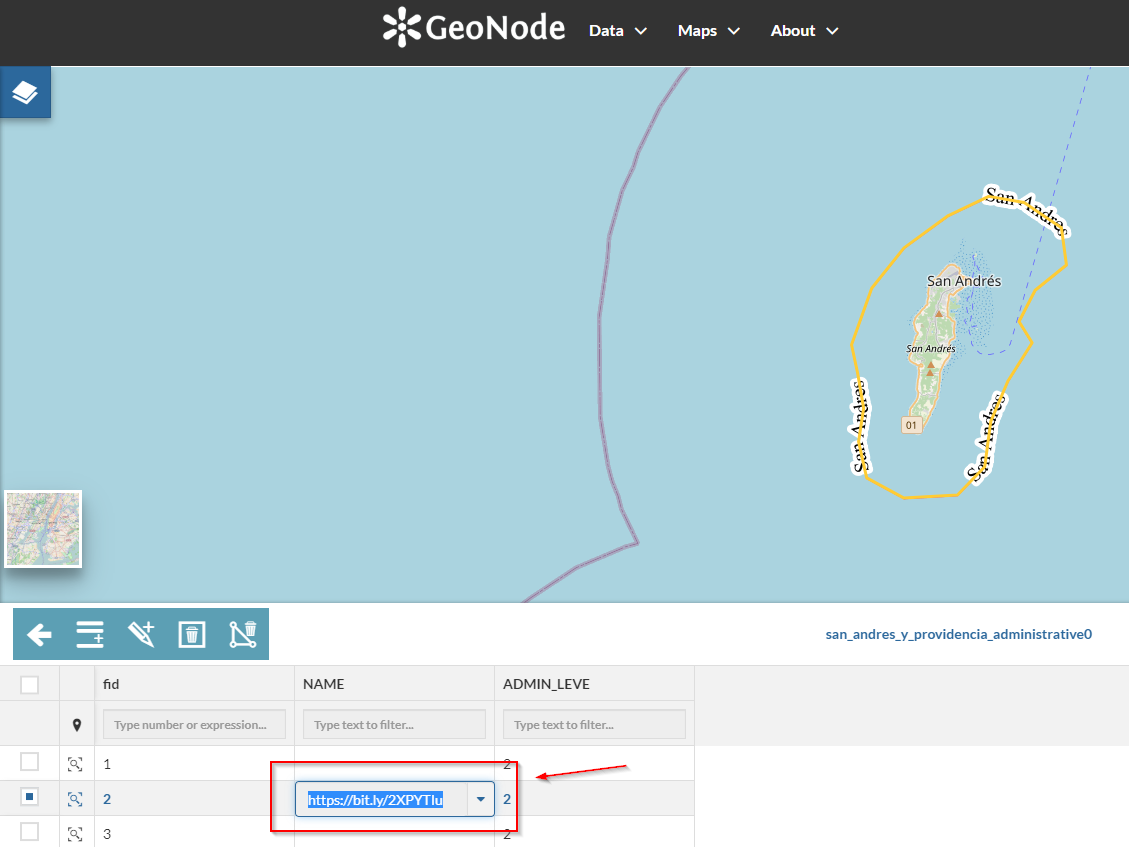
Fig. 7
you will get a nice effect as shown in Fig. 8
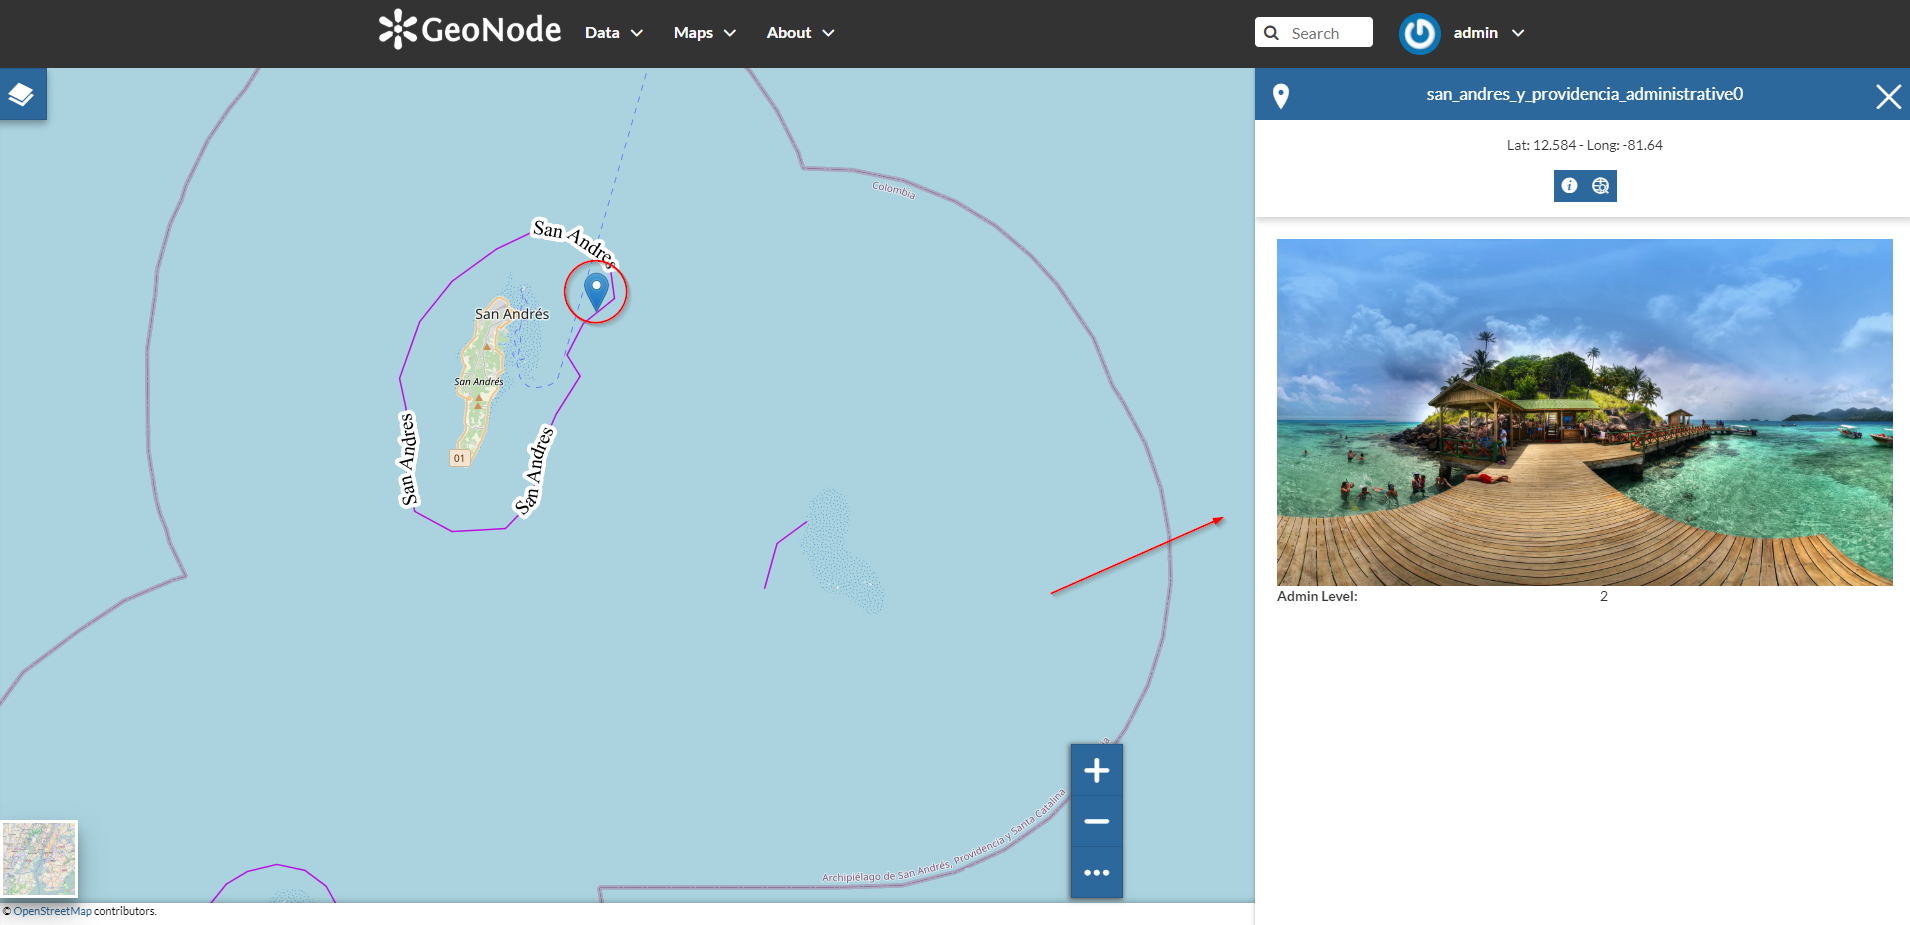
Fig. 8
Advanced Template: Use A Custom HTML Template
By selecting the option Use a custom template? as shown in Fig. 9
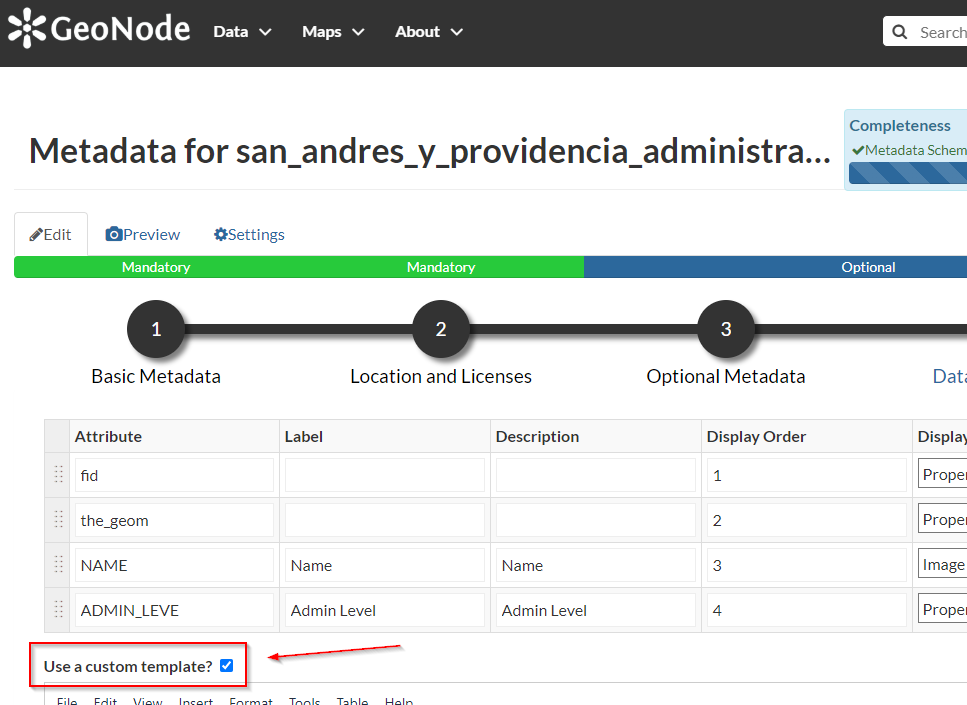
Fig. 9
You will be able to provide your own custom HTML Template for the Feature Info output.
The example below shows how it is possible to create a nice HTML output with an image taking the src from the attribute NAME values, through the use of the keyword ${properties.NAME}
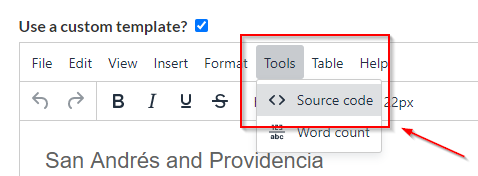
Fig. 10
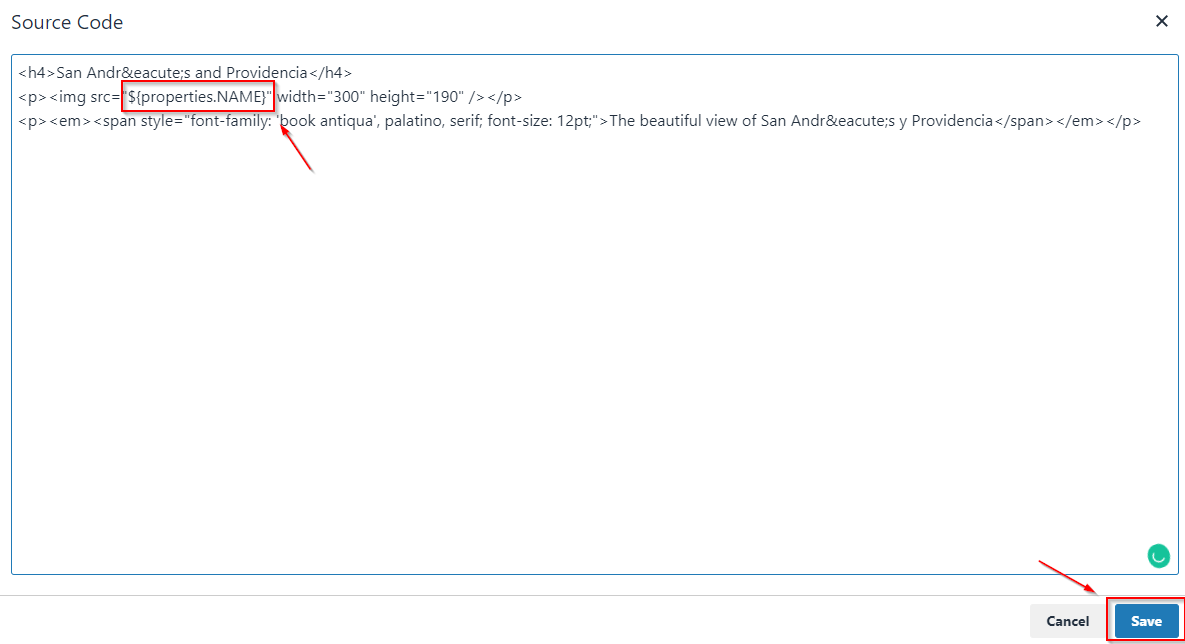
Fig. 11
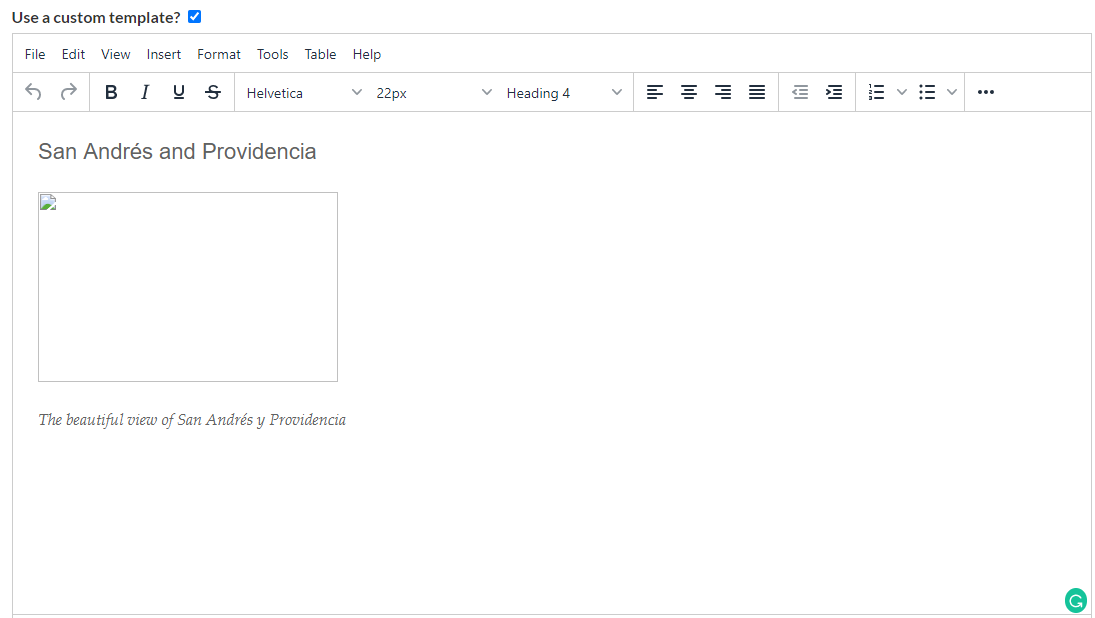
Fig. 12
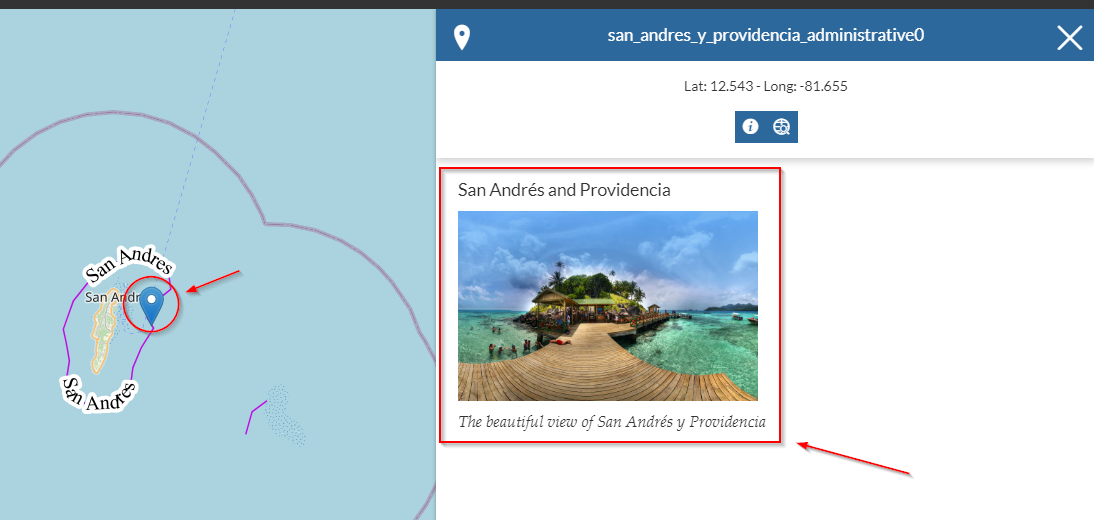
Fig. 13